Serger Project: The Robe Cardigan, Day 2
sponsored by Jones & Vandermeer
Today I'll be covering the making of the The Robe Cardigan Muslin. I left off having cut out the pattern pieces of my traced pattern. With only 3 pieces, it was very fast and easy.
First, what is a Muslin? Muslin is the term used for a kind of first draft mock-up of a garment. It's named after the undyed, less expensive cotton fabric, used for making the mock-up. Essentially, muslin can refer to either, and the mock-up can really be made out of anything you want.
Swedish Tracing Paper is this amazing kind of paper sewers use to trace off a pattern and sew together for the mock-up. It's a little stiff, but it's even less expensive than muslin, and can give you a pretty good idea of your finished piece. It's a nice alternative.

© CreateForLess.com
(As a knitter, I use Swedish Tracing Paper for wet-blocking, but that deserves its own entry.)
I buy muslin by the bolt at Joann Fabric & Craft Stores. They always have coupons or deals, and when I get a "40% off one item" coupon, they don't mean 1 yard. They mean 1 cut. So, I get the whole 25 yard bolt at 40% off, which ends up being around $45. It's a great deal.
Please note: Usually, you would want to make a muslin in a similar fabric as your final garment. I should be using a knit fabric, one that imitates the Nani Iro Double Knit, but I don't have any on hand. Also, this particular project isn't form-fitting, so I'm not too worried. I just want to make sure everything fits aka it's big enough to get over my linebacker arms and shoulders.
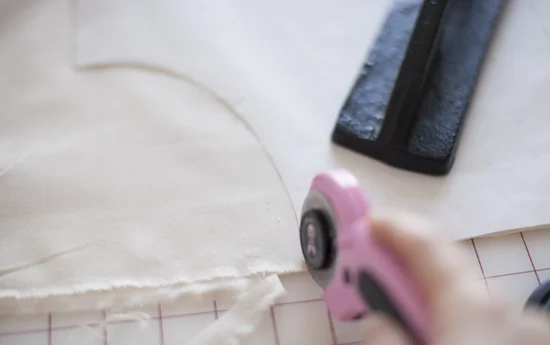
With the pattern pieces laying smoothly over the muslin, I strategically put down the weights so they won't be in my way while I'm cutting. With my rotary cutter, I carefully and slowly cut around the pattern. I find when I use pins and scissors, I end up shifting and warping the fabric. And when there's a nice long straight edge, I'll take out my rotary cutting ruler and use it as a guide.


Because I'm a righty, when cutting around a convex curve, like a sleeve cap, I like to keep the pattern piece to the left of the blade. I can easily keep an eye on the pattern while cutting, and cutting in that direction makes navigating around much easier. For a concave curve like an armhole or neckline, the opposite is true. I keep the pattern piece to my right.
Once everything is laid out and you've started cutting, try to avoid moving any pieces around. This can be very challenging especially if you're working on a small cutting mat, or a table that can't accomodate the entire piece. Just be very careful to realign everything if you do have to move things around.
I always seem to forget to snip notches, but I remembered this time - phew!

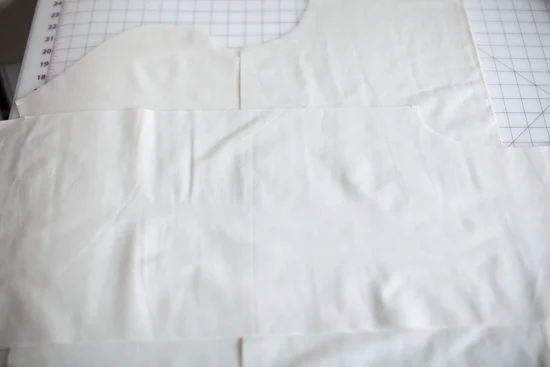
OK! All of the pieces are cut, notched and ready to go.
In the few sewing classes I've taken, serging has only been used for finishing. Seams are sewn, and edges serged as you go along. But serging is never part of the actual construction. A "safety stitch" is usually needed. But after doing a little online reading, I think the safety stitch is really only for wovens. A safety stitch isn't appropriate for knits since it would inhibit any stretching. So, I'm moving onward using only the serger for construction... even on the muslin.
A 3-thread or 4-thread overlock stitch would work for this. The only difference is that there's an additional line of stitching in the 4-thread stitch which aids in keeping the stitching from unraveling.

Left: 3-thread overlock stitch; Right: 4-thread overlock stitch
So, I'll go with a 4-thread overlock stitch to put together the muslin...
Since my Evolve does not require manual looper threading and has the nifty Jet-Air Threading System, I'm able to thread my loopers with ease. I simply place the end of the thread into a hole, and press down on a lever. (Baby Lock has since updated this system to the ExtraordinAir System which has a button instead of a lever, and you can place all the thread ends in at once.)
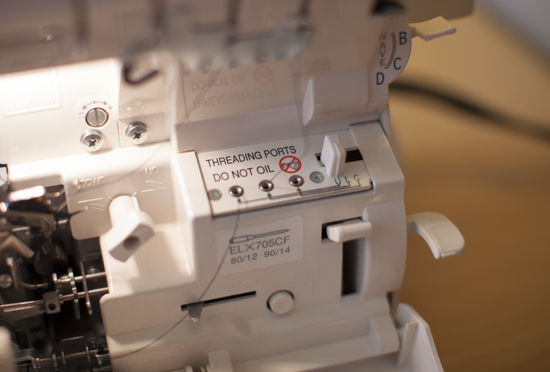
This automatic threading system is amazing. As a beginner, the last thing I want to worry about is the threading of the loopers.
After taking some time to decipher the Japanese instructions, I began:
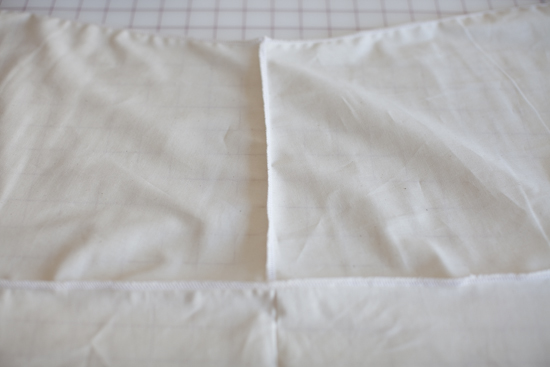
Vertical stitching: The two front pieces serged together. Horizontal stitching: The fronts serged to the back piece lining up the stitching with the center back.
As I continued following the instructions blindly, I realized I should have kept the sleeves open and serged them along the front and back armhole openings first. But, I know it's possible to serge "in the round", so I decided to move forward. Some thoughts about inserting a set-in sleeve with a serger:
- Careful with the pins. You'll ruin your blade if you knick them.
- Because you can't start by feeding the fabric in before the blade and foot, angle the fabric to serge onto it, or cut out a little divet so it can be placed right in front of the blade to start serging.
- DIFFERENTIAL FEED. The differential feed can help the easing of the materials together. It also helps a lot with knit fabrics in that it controls it and keeps it from splaying out and kind of ruffling. I've only ever played with these settings, so this will be a learning experience.
OK, I cut a little divet and I kept my differential feed at N starting at the underarm/side seam. Once I reached my first notch, I moved my differential feed up to 1.5. Since the easing happens between the notches, you wouldn't want to be easing at the underarm.


Differential Feed - The lever looks misaligned when viewed straight on, but when viewed from your working position it's lined up correctly.
Once I reached my other notch, I moved my differential feed back to N, then serged off the side, at an angle. Upon inspection, the 1.5 setting seemed to work fine. The notches lined up nicely between the sleeve cap and the armhole.
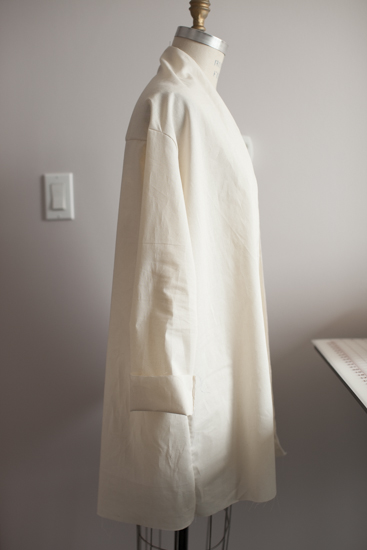
So here's my finished muslin. It fits fine. It's a simple silhouette, not meant to be tailored, so I'm not being too nit-picky, and in a knit it will drape more nicely. (Apologies for no modeled pictures. I'll have some of the final piece.)


I can't wait to get going on the real fabric. Stay tuned!